
Tile Flooring - How to spice up your outdoor spaces with some accent tiles
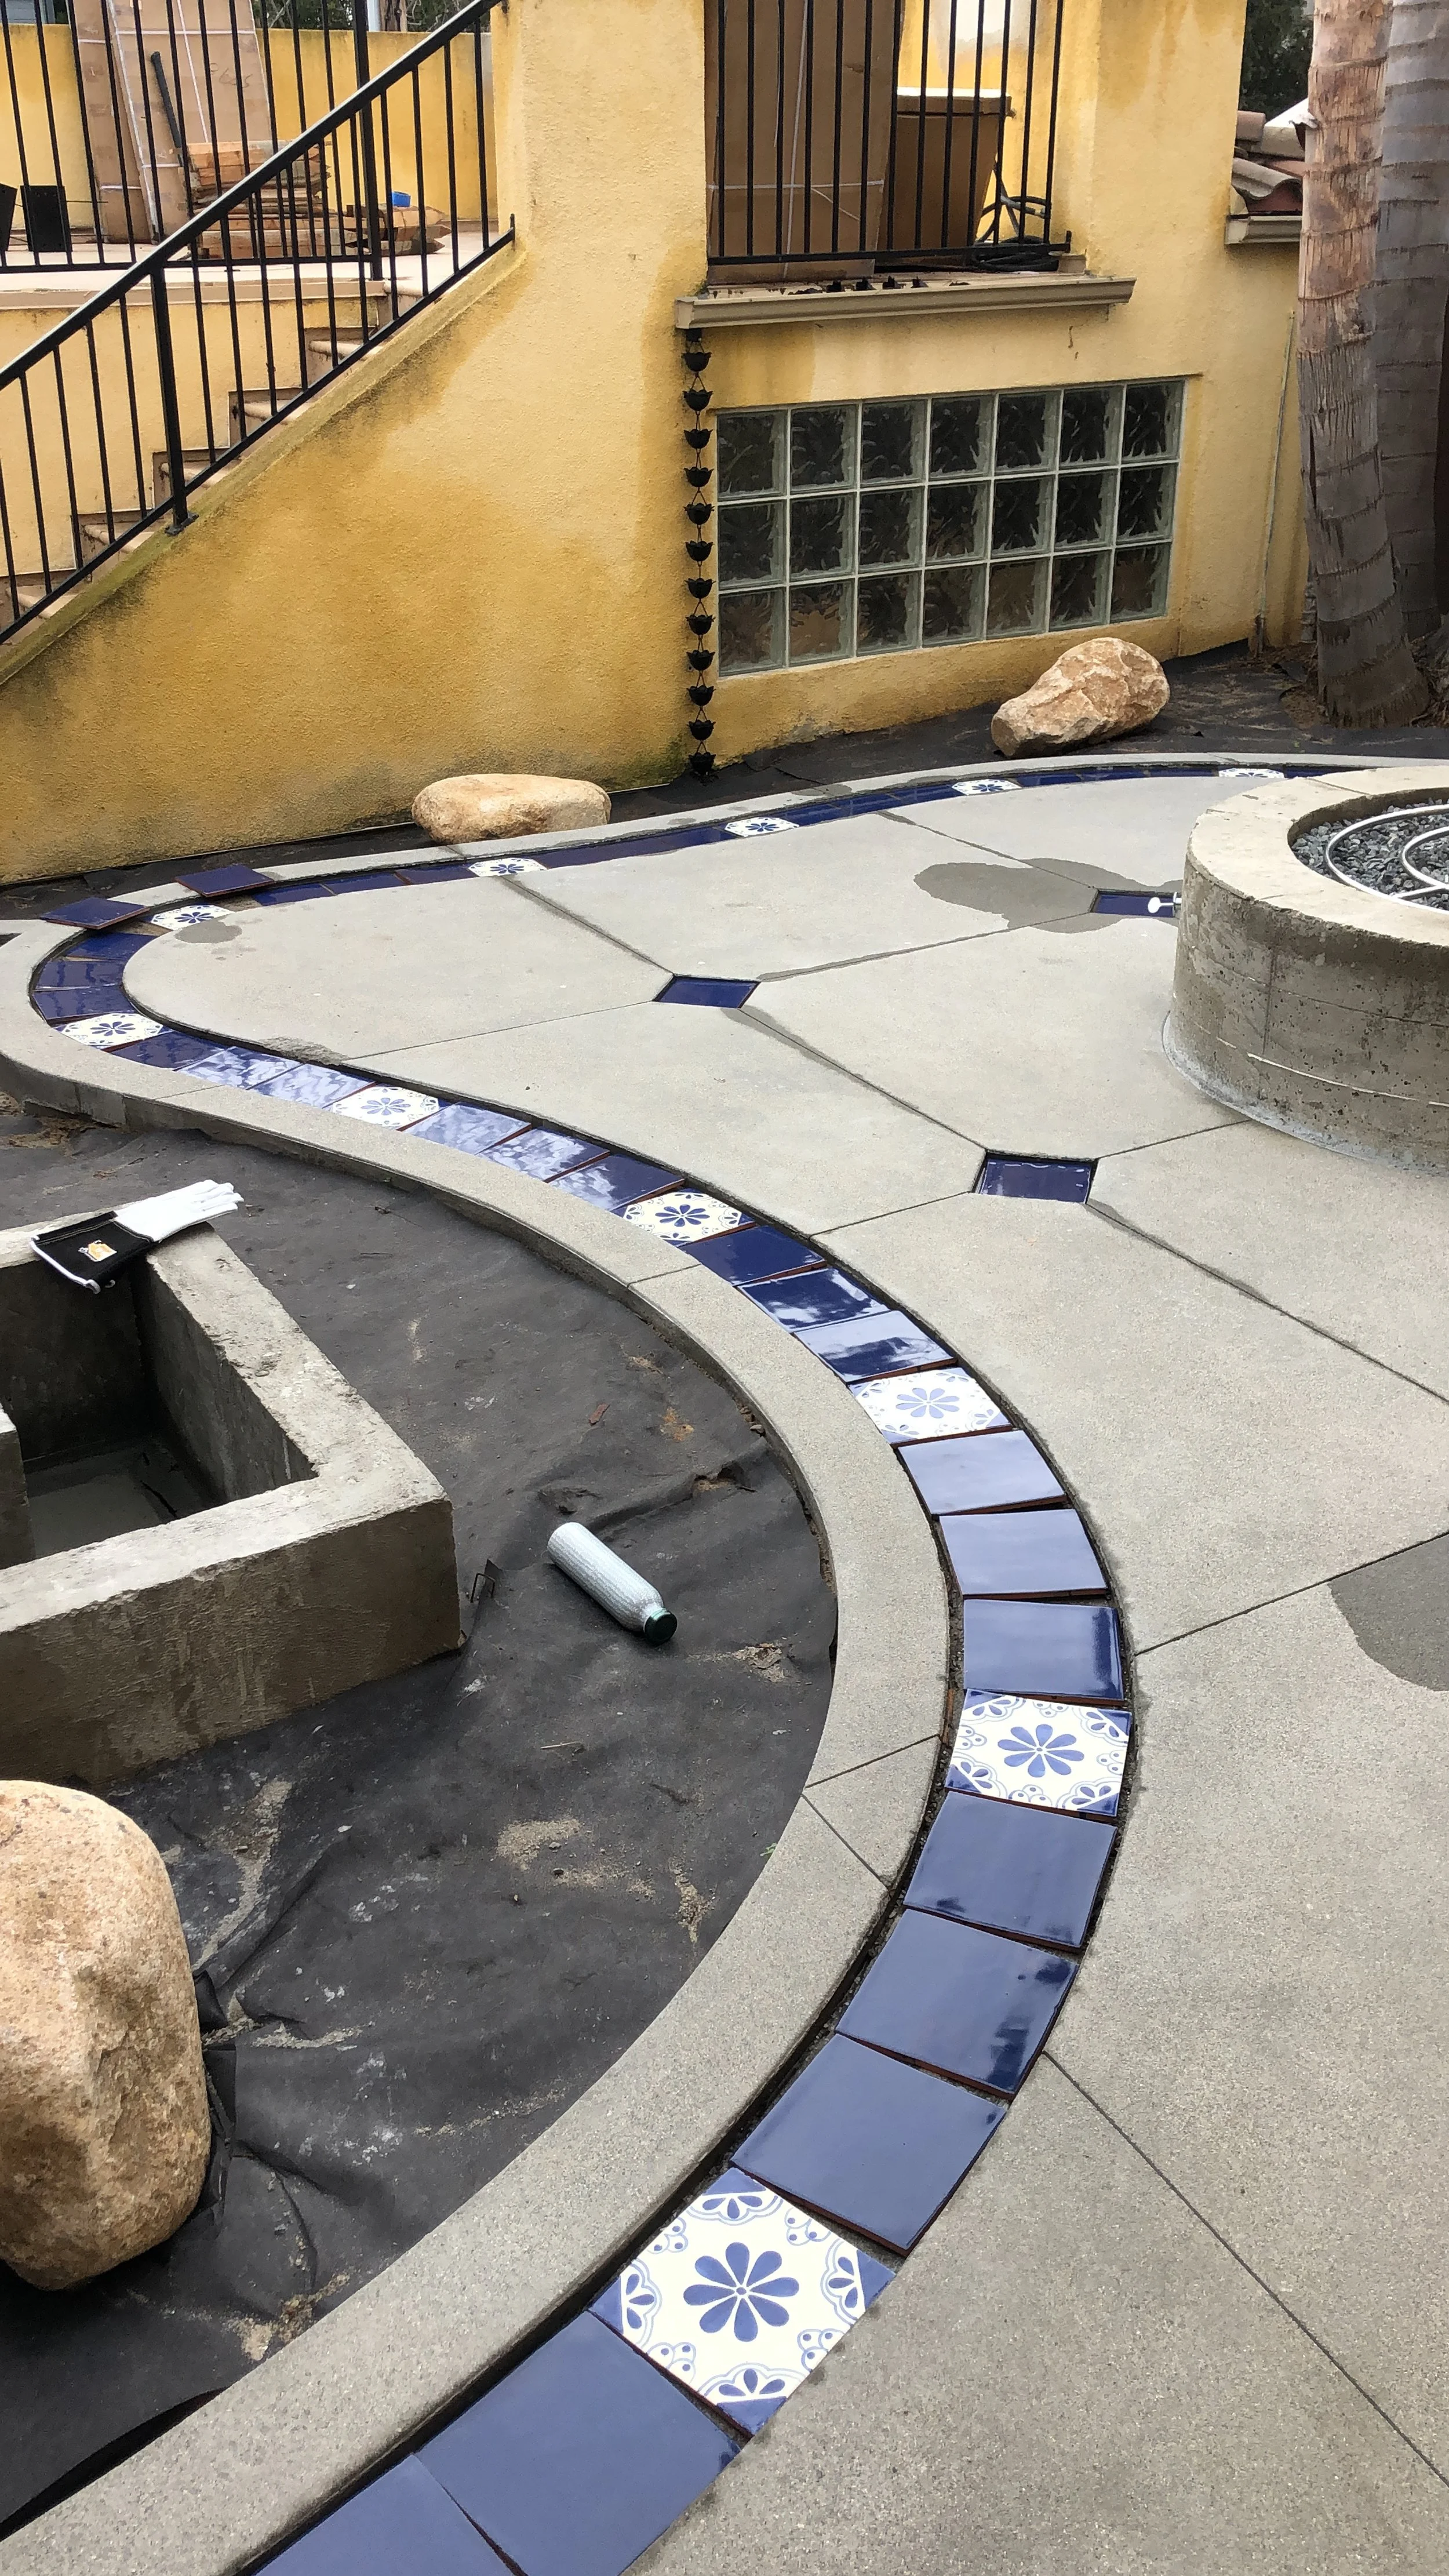
As we are heading into the fall season we are also starting to plan our upcoming festivities: Halloween, Thanksgiving, Christmas, Hanukkah and so on that we love to spend with our family and friends…but your outdoor space might need a bit of a color pop or some character to it. Have you ever considered tile flooring or tile edging on concrete for your outdoor space? For a smaller section this is a relatively inexpensive way of adding some personality to your home. There are thousands of colors and pattern available and some of our very favorites are the mexican tile designs. Most tiles are available in standard sizes like 2”x2”, 4”x4”, 8”x"8” and 12”x12”. You can check out some of our projects below that have either tile edgings, tiles in between the concrete joints or customized fireplaces and fountains. Once you know the steps of how to place, space and cut your tile before securing to the ground, your possibilities are endless.
Let’s jump right into the process of how to lay your tile on the cement floor:
HOW TO LAY TILE ON CEMENT FLOOR
Mark midway line so tile cuts can match on each end
Find the highest point of your floor start there.
Lay a single row of tiles in both directions without mortar including spacers at the midway point. Stop when there is not enough room for a full tile. Adjust the midway line so half a tile is on each end.
Use thin set mortar as your bonding agent, using a bucket and drill with a mixing paddle. Mix mortar till the consistency is similar to peanut butter.
Use a ⅜ inch notched flooring trowel to comb laid mortar evenly.
Use a thin trowel to remove excess mortar and make sure to use a wet sponge to keep the face of the tile clean.
Consistency check with a level and make sure the tile is flushed against one another
Use spacers in between. The size of spacers will determine how big the grout lines are. (Example 1/16 spacers for very small grout lines.)
You can use a rubber mallet to adjust height of tile on top of thin set mortar.
To make cuts at the end simply place tile on top and make a mark with a pencil. Tolerance cuts should be ⅛ inch.
Cut your tile using a wet saw take the process slow.
Always wear eye protection and measure twice before cutting.
For the grout remove your tile spacers.
Your grout should be the consistency of pudding when mixed.
Spread grout in sweeping arcs holding at a shallow angle one 4x4’ section at a time.
Remove excess grout with cement float.
Cement grout will set in 5-15 minutes.
Clean cement grout when done with sponge and rag to remove all the excess on top of tile.
If you decide to only do the tile as an edge design along your concrete area, you need to make sure that you leave an indented space in the width of the tile PLUS the measurement of the spacing that will be filled with grout. You can create the area using your tile as reference and also by adding 1/4” additional depth so that you can apply the mortar with the tile still being flush to the rest of the concrete flooring.

PLACEMENT OF TILE TO DETERMINE CUT AREAS.
TILE EDGING ALIGNMENT BEFORE MORTAR APPLICATION

FRAMING BEFORE TILE

AFTER
AFTER

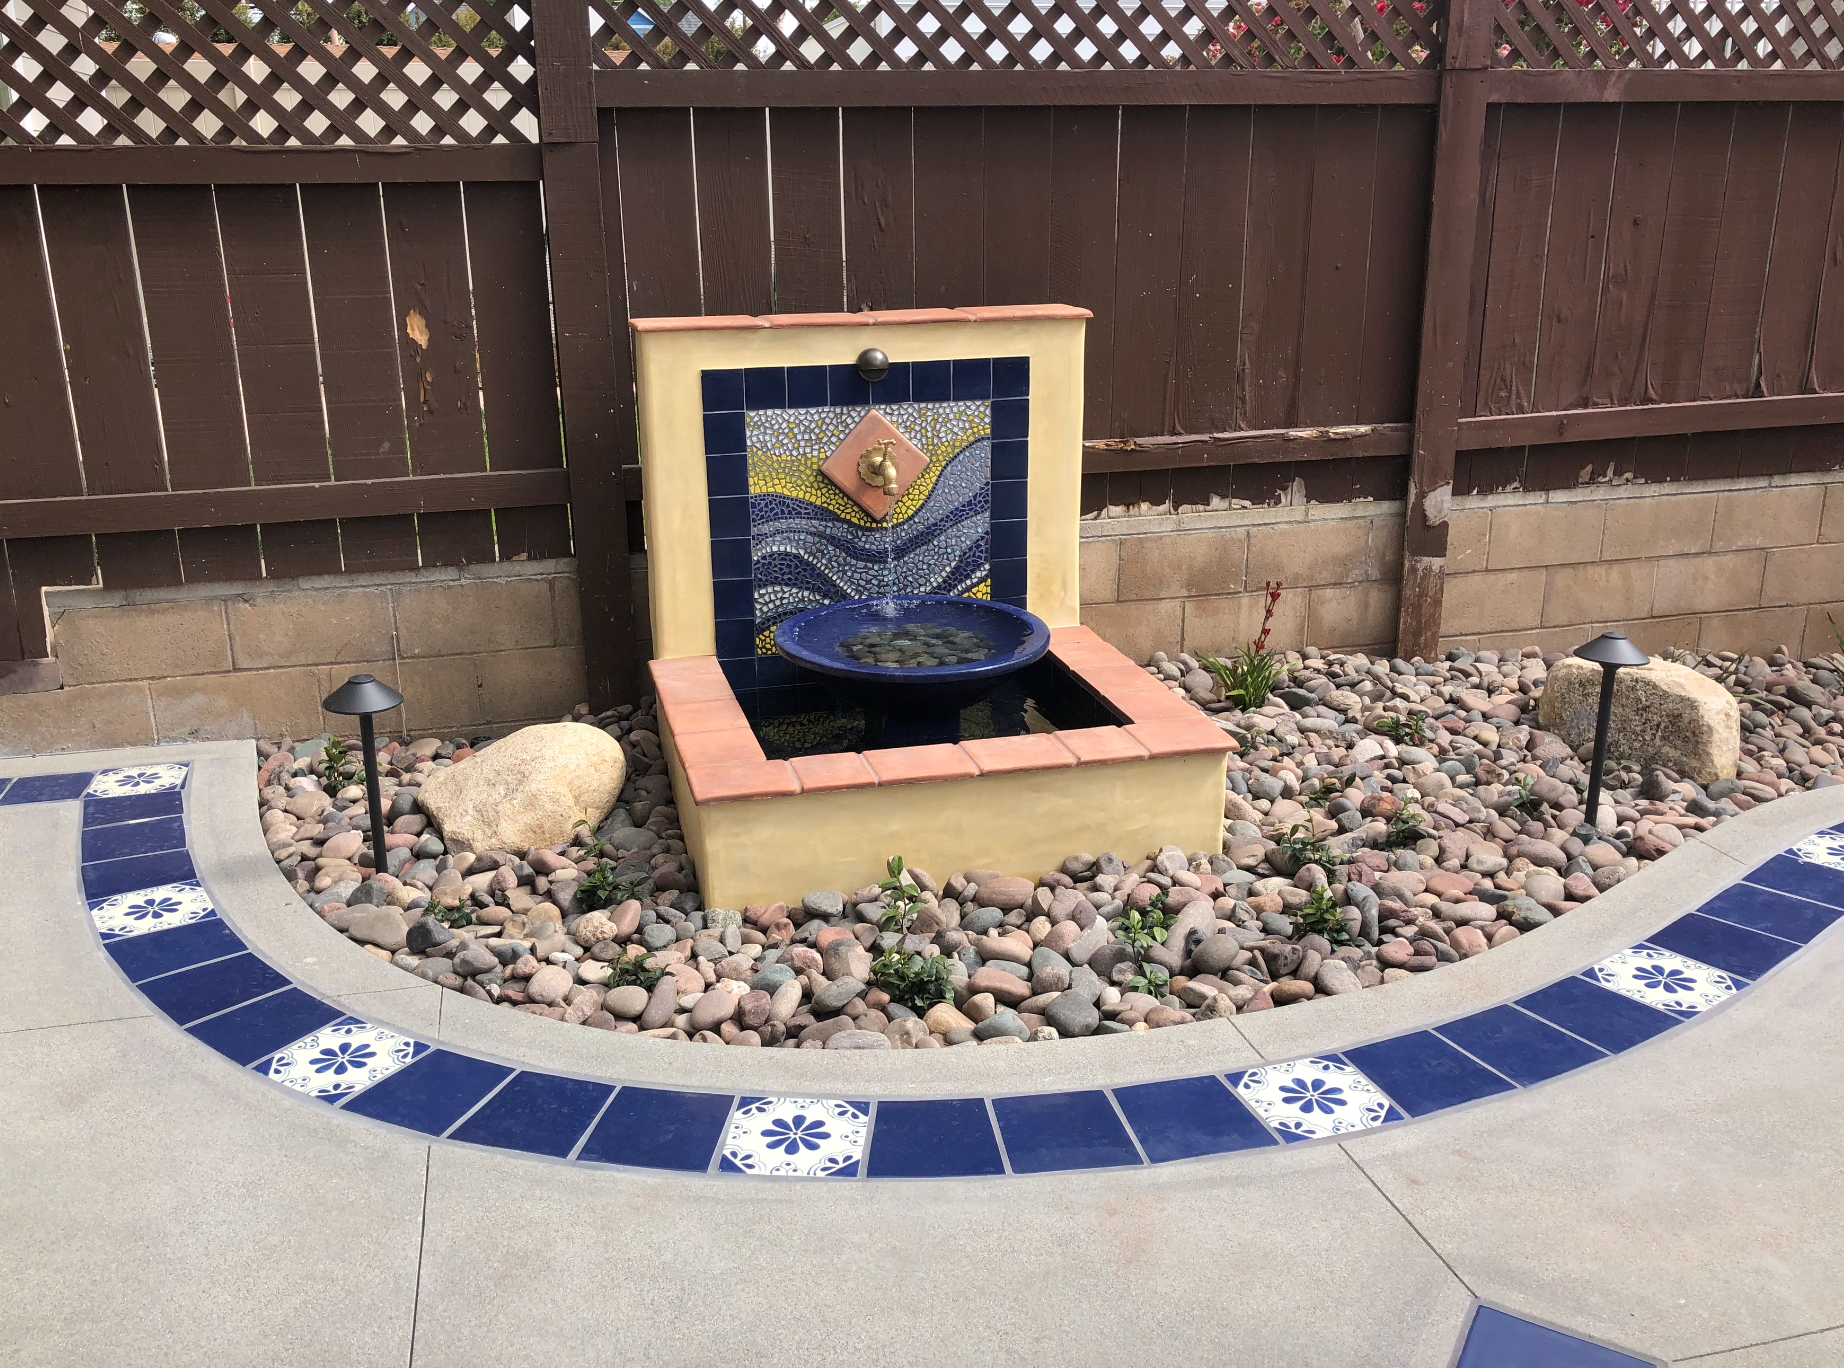
CUSTOMIZED FOUNTAIN WITH TALAVERA TILE DESIGN

TILE EDGING AND TILE AT CONCRETE JOINTS

CUSTOM FIREPLACE WITH TALAVERA TILE