How to overseed your lawn and why it is important
You might ask yourself why overseeding of your lawn seems like a good idea, like grass grows anyways right? But this is not entirely true. Overseeding is simply a process of spreading grass seed over your existing lawn to thicken the grass and improve its health. And best part: It does not cost a fortune.
The perfect time to reseed or overseed your lawn is fall since the soil is still warm but the heat waves have (finally passed). Another good reason for fall seeding is that weeds do not germinate during fall which means they won’t steal all the nutrients and the space from the grass seedlings that try to survive. Rain season (well if we can call it that in always sunny San Diego) is also right around the corner and will provide some random rainy days or at least sprinkling throughout the day which helps the seeds to sprout and roots to establish.
If this was enough convincing for you to get your very own overseeding project going, let’s dive into the logistics:
First question you might be asking: How do I prepare my existing lawn?
Before you do anything else, mow your lawn (yep you knew this was coming). Cut it as short as possible but if your lawn is pretty high cut it down in stages, over a couple weeks rather than chopping it all down at once (this is very important)
Now the seeding: figure out what kind of grass you have if you don’t already know this. For example DO NOT mix native grasses and regular grass, it will cause a lot of issues since grasses require different maintenance (from blade length to watering and fertilizing). If you have regular grass make sure to purchase a high quality batch of seeds, appropriate for your climate area and that state the following: all purpose mix for sunny AND shady areas, quickly repairs empty areas, ideal for growing etc.
If you have native grass reach out to your native grass vendor to purchase the SAME native grass seeds as your existing lawn
After purchasing your seeds do not run on your lawn sprinkling those like confetti all over the place. There is an important step to follow BEFORE you get to the fun sprinkling part (which is a fun and great activity to involve your family members in). You need to get some top soil that is specifically ideal for growing your lawn. This option has some fertilizer already included——> Scott Turf Builder
Spread the turf builder soil on top of your existing grass in a thin layer.
NOW get ready to sprinkle!!! Add a generous amount of seeds on top of the soil throughout your lawn areas. Finish by adding another thin layer of top soil to it. Do not forget this step since the top soil will make sure that the seed stay moist, will keep birds from picking the seeds off your lawn and be a perfect nesting situation to prepare your seedling to sprout into beautiful grass.
If you did not purchase soil with fertilizer make sure to get some fall or even better year-round fertilizer to add to the top of your soil. This will provide all the necessary nutrients for the seeds to sprout and also for your existing grass to grow thicker and nicer than before.
Make sure to WATER the lawn for the next 2 weeks twice a day for about 6 minutes, once in the morning and once in the evening.
The hardest part will be to stay off the grass areas until your grass is nice and thick established. This is a bit of a waiting game but if you can’t keep yours or your pets/childrens feet off the new baby grass it will cause it to break and all your hard work will go to waste.
I promise that this project will be incredible rewarding once the first month passes you will start noticing the beautiful changes on your lawn. You will be the neighbor with the always ‘greener grass’.
Happy Gardening!
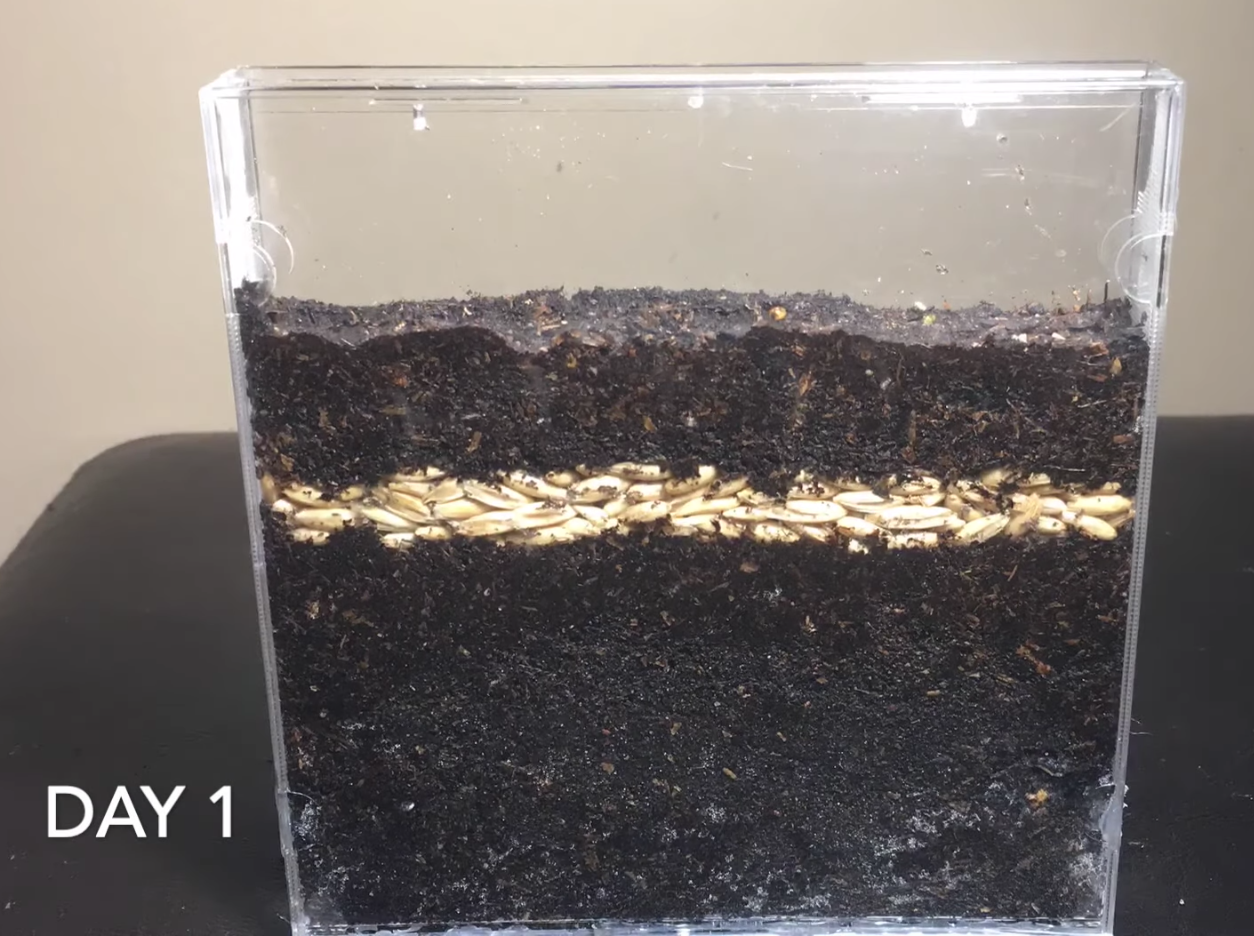
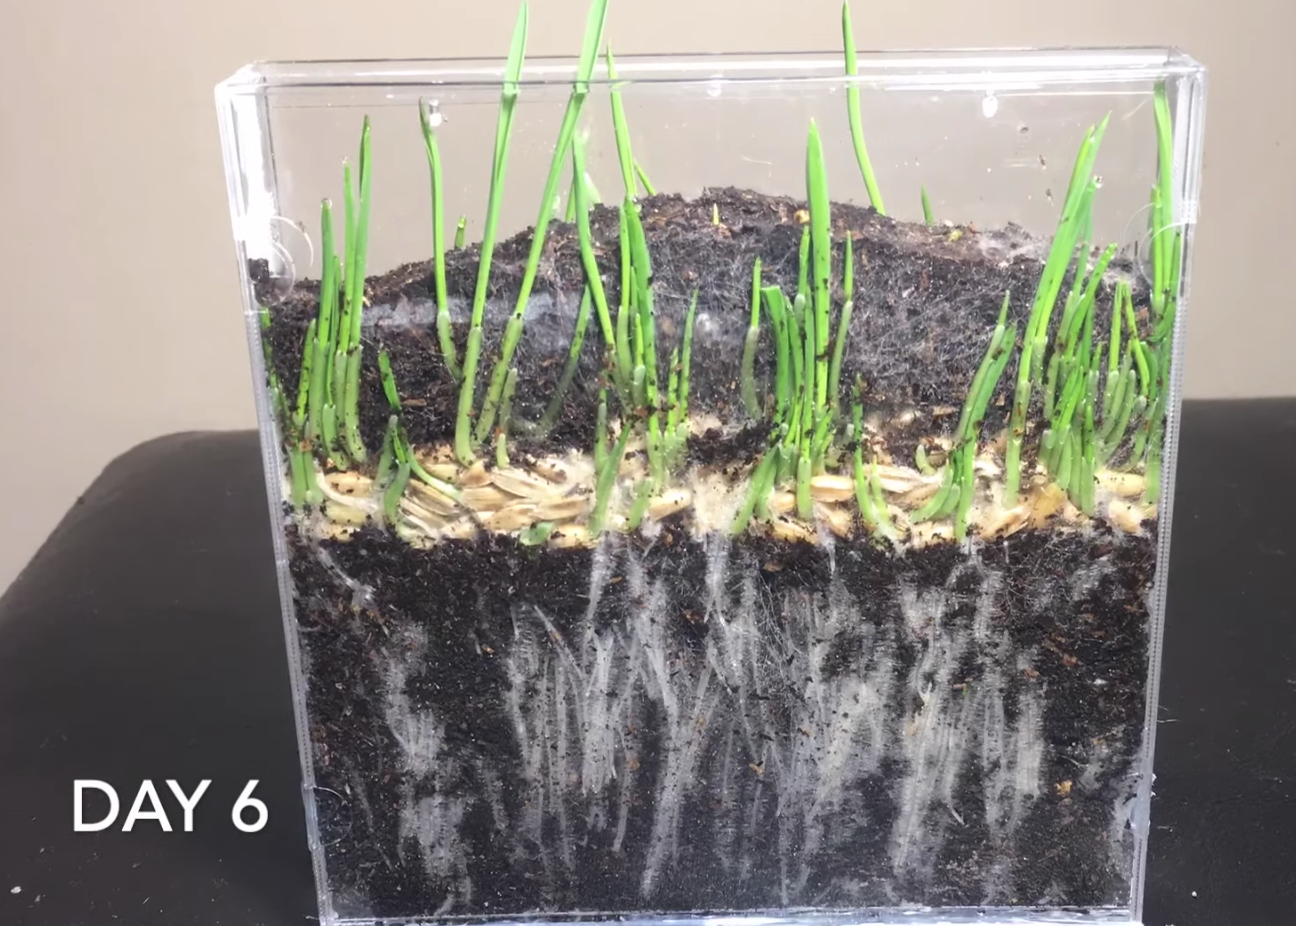
PS: If you are interested in seeing the progress of grass growing from DAY 1 - DAY 10 HERE